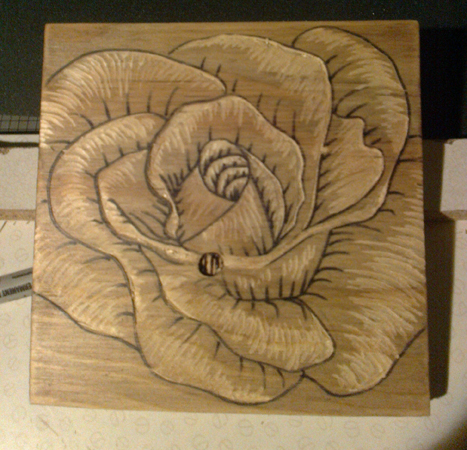
I have been keen to start printmaking from woodcutting at home for some time and I can now say that I have successfully finished my first set of prints!

Equipment and Materials
Starting from scratch, I had a long shopping list of equipment I was going to have to buy to do this – but I was unsure what was best to spend my money on. Being my first attempt from home I couldn’t see the point in spending a fortune on professional materials, and besides, surely some of it is down to technique not materials?
I’ve always been very resourceful with materials anyway, I believe that I don’t always have to spend money and there are many things around the house and garden that can produce a much more unique result.
I had been advised that the best investment to make is on the knives, so I splashed out on a decent set of student cutting tools from Lawrence’s. I also bought a new rubber ink roller (although if you shop around there are a few second hand ones available on ebay). The third thing I invested in was a small pot of black oil-based ink.
For ‘practice wood’ I visited the local DIY shop, and managed to haggle a deal for some off-cuts, thus rescuing waste material destined for the scrap heap and doing my bit for the planet 🙂
I found a tin of old wood varnish and sheets of sandpaper in the garage and after a couple of layers of varnishing and sanding the wood was smooth and ready to go.

How I did it
I drew my design on paper and then when it was ready, transferred using carbon paper and went over it with a permanent marker pen.
After cutting out my design, I made a ‘rubbing’ with some light paper and crayons, to check the design was how I wanted it to be. There was a knot in the wood that I couldn’t avoid so I decided to edit the design to hide the knot – I made a few adjustment cuts in the wood and was ready to go.
I spread the ink onto a glass surface (a kitchen chopping board!) before inking up the wood.
I laid the paper over the top of the wood and carefully used a smooth door knob (more resourcefulness!) to rub the ink onto the paper, being careful not to move the paper and cause a ‘ghosting’ effect on the print.
I had a variety of paper kicking about so decided to experiment with several types. Parcel paper, cartridge, watercolour all provided different results.
Not bad for a first attempt!


1 Comment (+add yours?)